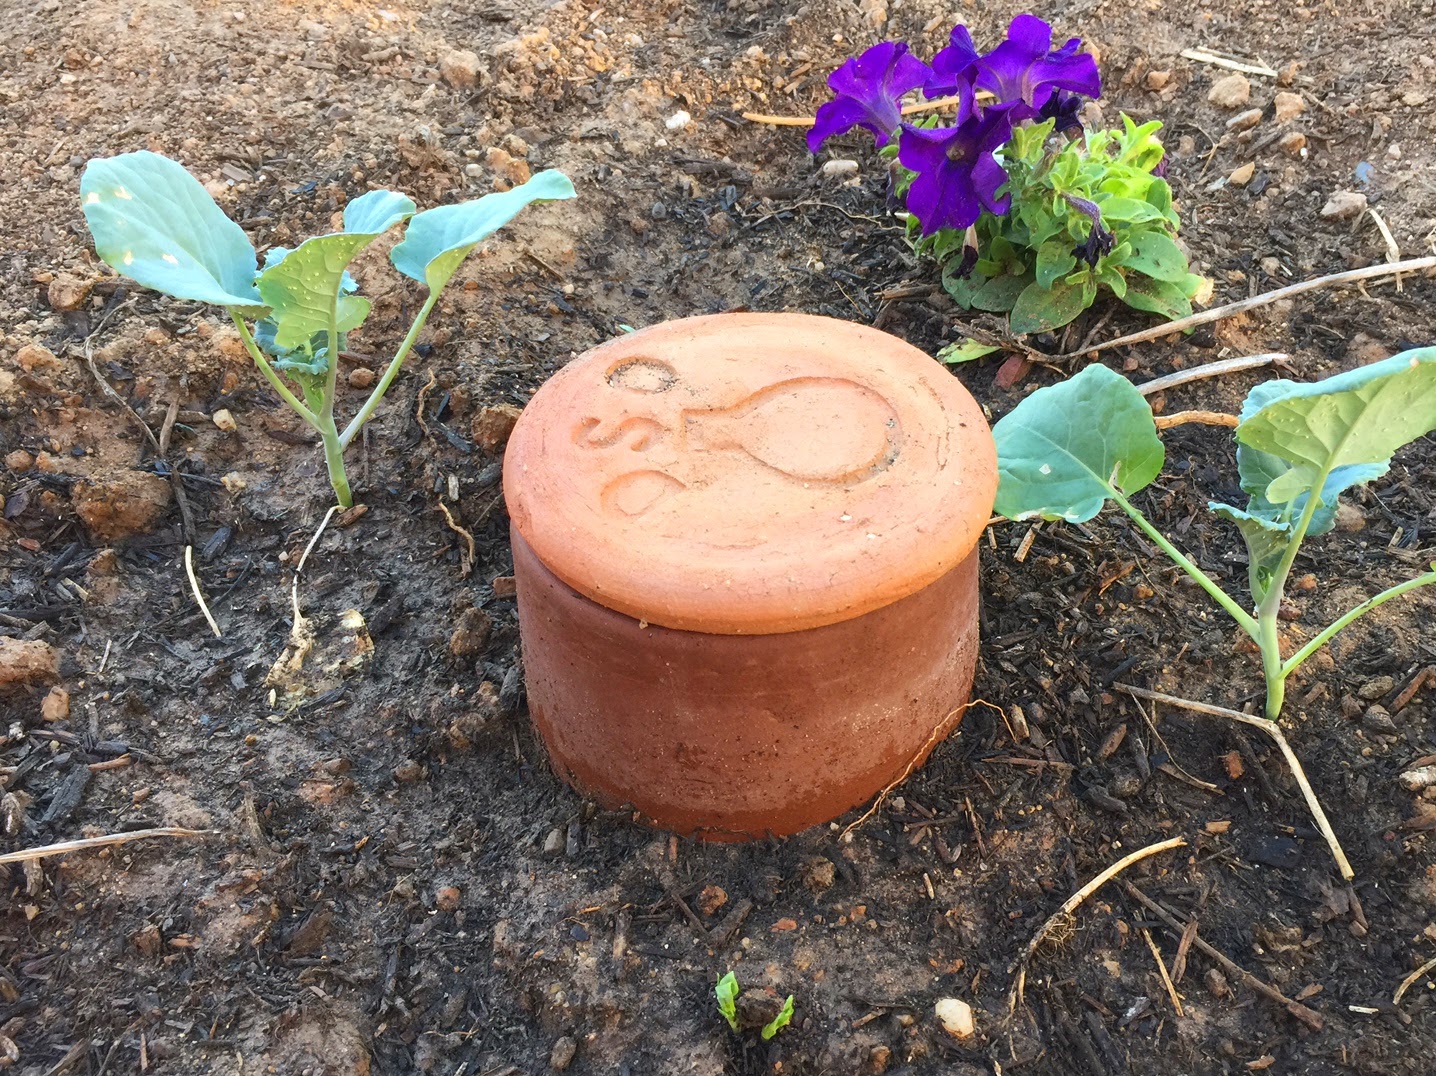
Before we talk about my latest obsession, I need to make a confession: I hate composting. I still do it, because I would be consumed with overwhelming guilt if I didn't, but I hate it. It's messy and stinky and it attracts bugs. Ew. I just hate the bugs. And it's not like I haven't tried lots of things to try to make it better. Here's my sad (and whiny) tale:
I started with a free composter offered by the city of Gilbert. It looked something like this.
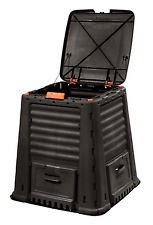
Total disaster. I couldn't properly stake it into the ground, because the soil where I was trying to place it was the consistency of concrete and the stakes it came with were approximately the size of thumbtacks. My husband and I are both pretty wary of rodents coming into the yard, so having what essentially was an open-bottomed food receptacle was a no-go in our minds. I sent it back.
Next up: I got a couple of those turny deals that are completely enclosed and make it easy to aerate your compost. Specifically, I got the Keter 17186745 Dynamic Composter (60 gal). Here's a lovely picture of a mother and daughter using one in their idyllic country yard:
I wonder what that mother has to do to get that daughter to compost? Bribery? Threats of grounding? I just don't have to the parental backbone to deal with the whining that would ensue. Yeah, sometimes my daughter likes to turn the crank on our composter, but be close to it when the door is open? No thanks! And by the way, we have big bungy chords wrapped around ours because the doors have a tendency to pop open when the composter is full and the contents dump out everywhere. Sooooooooooo lame.
And when we finally have finished compost? It's easy enough to dump it on the ground underneath the composter, but getting it into the garden is a bit of a logistical nightmare. I either have to scoop it out of that thing into another container and haul it over to the garden (no fun) or drag the whole composter over to the garden and empty it there (awkward). Either way, I'm reaching pretty deep into the thing to clean it out, because a decent amount of compost doesn't want to come out on its own. (Gross)
So to deal with the not-easy-to-empty-out problem, the next thing I tried was garbage cans. I just took some heavy duty trash cans with lids that stay on well and drilled lots of holes in them. When it comes time to turn the trash cans, I put them on their sides, and push them around with my feet. Not bad. They are easy enough to turn, protect the compost from critters, and are easy to dump into the garden when the time comes. Sounds like the perfect solution, right?
No! I still want something better! I'm a big whiny baby who still wants to have something easier! Wah! Wah! Wah!
Enter my new obsession: Keyhole gardens. There are a couple of variations on keyhole gardens, but the one I'm talking about has a compost pile right in the middle. The basic idea is that you create a circular garden with a notch on one side and a hole in the middle (i.e., something that looks like an old-fashioned keyhole from above) and you put a compost pile smack dab in the middle. Like this:
Here's another view:
Once you set this up, all you have to do is periodically water the compost, creating compost tea that seeps into the surrounding garden, nourishing the plants. Which means you never have to turn the compost and you never have to move the compost. You just throw your "greens" (kitchen scraps in my case) and "browns" (shredded newspaper in my case) in there periodically and water the compost tower periodically. Are you hearing me people? Composting just got lazier! Woo hoo!
As best as I can tell, this gardening method was pioneered by the Send a Cow organization to help families in Africa with poor soil and limited water. (Yup, in addition to helping lazy gardeners like me, it actually has a much more altruistic purpose.) Apparently, keyhole gardens are catching on big in arid climates in particular, because they save water in addition to using compost efficiently. Specifically, keyhole gardens appear to be catching on big in Texas with the help of Dr. Deb Tolman and Texas Co-op Power. (I have to admit, I still don't fully understand how they save water--they are raised beds, which traditionally suck up more water--but results don't lie!)
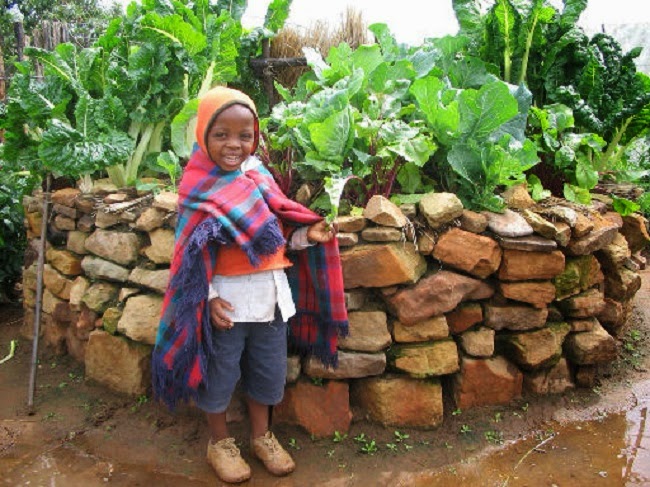
So in addition to making composting easier, keyhole gardens also save water? Sold! I can't set one up yet, since I've already planted my spring/summer garden, but I can start planning for next season. In the meantime, I'll pour over pictures of other people's keyholes gardens and come up with my perfect plan. The thought of makes me almost as happy as this little cutie appears to be with his new garden:
I'm Claudette and I have a young daughter named Chloe. We live in Gilbert, Arizona. My hobby is edible gardening and I'm trying to get my daughter into it too. (Maybe, just maybe, it will make it easier to get her to eat her vegetables if she helps grow them!)
Thursday, March 19, 2015
Thursday, February 19, 2015
Planning My 2015 Spring/Summer Garden
- Use succession planting to keep the garden going at full production from early spring throughout the end of summer. (Anyone remember the domino disaster from last summer? Let's avoid that happening again, shall we?)
- Experiment with using okra to shade tomatoes throughout the whole summer, keeping the delicate little darlings going so I can get a second batch of tomatoes out of them in the fall. (Tomatoes are the delicate darlings here, by the way. Okra is an indestructible summer warrior.)
- Make the most of companion planting to help ward off nasty bugs.
- Squeeze in a lot more varieties of vegis than previous years. (I've got a big garden--17 by 24 feet--I ought to have room to experiment with some exciting new edibles, don't you think?)
- Add flowers to spruce the place up.
- Work around the existing plants that I have (like gazanias and artichokes) that will keep going throughout the spring.
- Incorporate more of my beloved ollas into the garden.
Planning the Okra and Tomato Patch
Let's start with my okra and tomato patch. I won't tell you how many iterations it took me to get to this, but here's the final plan. I started by building a ring of okra plants around ollas. I needed to make sure I would be able to reach the ollas to water them (hence the gaps in the ring), and that there would be plenty of room in the center of the ring for the tomatoes. I also wanted to make sure to cram the okra as close together as possible to create a nice humidity zone during the summer:
Next, I added tomatoes in the middle. I didn't worry too much that the tomatoes would be hard to reach, because tomatoes don't produce in the middle of an Arizona summer anyway. (It's too hot.) The whole point was just to protect them through the summer so they could start producing again in the fall. I also added a few marigolds in there to help keep away the nasty buggies.
So now I had my tomatoes taken care of, but that wasn't quite enough okra for my taste, so I added another row for good measure. I also planned for a few basil plants in that row to help ward off more bugs (and because it's tasty):
Lastly, I surrounded the whole thing with a few lines of cosmos. Cosmos is also supposed to be a good companion for okra. Plus it's just plain pretty. (You'll notice a line of carrots in there too. Those were planted before I started my planning.)
In my area, the ideal planting dates for all these beauties are:
- Okra: Mid-March through May
- Tomatoes: Mid-Feb through March
- Marigolds: February through May
- Cosmos: March through June
- Basil: February through May
Planning the Corn and Green Bean Patch
Corn is a pretty high maintenance crop for the home gardener, but my family loves, loves, loves it when I grow it, so really, it's a must have on my list. My daughter has also recently informed me that she really likes green beans, so that's another must have on my list.
In my area, the ideal planting dates for my family's must-have vegis are:
OK, this is relatively straight-forward, right? I've got seven rows of corn (plus its companions, sunflowers and dill) being planted at periodic intervals throughout the growing season. The first row was planted on February 15th and the last row will be planted on August 15th. So far, so good. Now it's time to start layering in green beans.
In my area, the ideal planting dates for my family's must-have vegis are:
- Corn: Mid-February through early April, then again in mid-July through August
- Green Beans (bush variety): Mid-March through April, then again in mid-July to mid-September
- Green Beans (pole variety): All summer
- Contrary to popular advice, I don't plan to plant the corn and green beans together. (I've never been able to make that work.) Instead, I'll plant them in succession.
- Again, contrary to popular advice, I don't want to plant the corn in large blocks. People commonly advise this to help with pollination, but I always meticulously hand pollinate my corn, so it's not necessary in my case. I'd rather grow corn in small batches to have a steady supply of fresh corn for dinners. Fresh corn straight out of the garden is the real goal here--not so much that I end up freezing it.
- I don't have enough ollas for the corn patch, so these will be grown with drip irrigation. That means tidy little rows.
- I want to make the most of companion planting. For the corn, that means I'll plant it with sunflowers (to make the corn sweeter) and dill (to ward off bad bugs). For the green beans, that means I'll plant it with rosemary, radishes, or petunias (depending on when I plant) to ward of the nasties.
OK, this is relatively straight-forward, right? I've got seven rows of corn (plus its companions, sunflowers and dill) being planted at periodic intervals throughout the growing season. The first row was planted on February 15th and the last row will be planted on August 15th. So far, so good. Now it's time to start layering in green beans.
On March 15 (the beginning of planting season for green beans), I'll add a row of green beans and its companions (radishes in this case) where corn is planned for later in the season. The idea is that the green beans will have a chance to grow, produce, and be done before it's time to plant the corn on July 15th in the same spot. I've got a couple more rows of green beans planned to finish up before the corn ever gets planted as well:
And then the rest of green beans will be planted after the corn is finished. For instance, I have a row of corn that I planted on February 15th. I plan to plant green beans in that same spot a few months later on July 15th.
Planning the Rest of It
The rest of my plan is going to be pretty anti-climatic after all that. The remainder of my garden has a lot of existing plants in place that I had to work around, so I just squeezed in a few extras where I could. There's not a lot of complicated succession planting or plants protecting other plants. If any of them need extra shade, I'll just construct something and put some shade cloth over it. No permaculture ninja stuff here.
So here's my starting point. I've got some existing snapdragons, gazanias, artichokes, carrots, green onions, cilantro, parsley, and a peach tree to work around. Some are being watered with ollas, some with drip irrigation:
So I just decided to fill in the gaps with what I could--zucchini (a good old summer staple), armenian cucumber (something new and exotic), cantaloupe (one of my daughter's favorites), sunflowers (gorgeous!), butternut squash (I've got a divine soup recipe for it), peppers (why not?), another tomato or two (you can never have enough), and marigolds (to ward off bad bugs). Here's the final look:
And here are the three plans all put together to make up the whole garden:
Now there's just the minor matter of planting it all! Let's see how that works out!
Monday, February 09, 2015
It's "Go Time" in the Garden
Seasons change fast here in Arizona (except for summer, which drags on foreeeeeeeeeeeeeeeeeeeeever). A month ago, I was showing you pictures of frosty vegis. Since then, I've frantically been trying to keep up with all the garden chores associated sudden onslaught of spring. Here's what's been going on since I last talked to you:
Planning
First and foremost, I had to plan my spring vegi garden. This took me quite a while, because I had a lot of big goals for one patch of land:
- Use succession planting to keep the garden going at full production from early spring throughout the end of summer.
- Experiment with using okra to shade tomatoes throughout the whole summer, keeping the delicate little darlings going so I can get a second batch of tomatoes out of them in the fall.
- Make the most of companion planting to help ward off destructive insects.
- Squeeze in a lot more varieties of vegis than previous years.
- Add flowers to spruce the place up.
- Work around the existing plants that I have (like gazanias and artichokes) that will keep going throughout the spring.
But now that I've figured it all out, I have ordered my seeds and started the appropriate ones under grow lights in my home office. Here are the little darlings on their way now. Bless their little hearts.
They're so cute when they're young
Weeding
Meanwhile, while this was under way, we got a good deal of rain, which was lovely. Unfortunately, the weeds thought so too. Weeds popped up EVERYWHERE. I used to pay people to pull my weeds, but alas, I've decided to do it myself now. Times like these are when I have to decide how committed I am to that decision! (We can eat Ramen for dinner every night, right? It would be worth it not to weed that garden.)
Don't you hate it when guests come over uninvited?
I am resisting my temptation to go at it all with a gas mask and a huge canister of Round Up. Instead, while the ground is still soft, I'm gently digging under the weeds so I can get the full roots and then pulling them all up, roots and all. Soon, I will douse the whole area with preemergent, a weed blocker made from 100% corn gluten. (Apparently, weed seeds are gluten intolerant.)
Preemergent doesn't kill existing weeds, but once you weed an area, it should keep new ones from popping up for 3 months. I'm sure in May when it's 100 degrees outside and the weeds start popping up again, I'll wish that I had gone for the Round Up, but right now, it seems like a good option.
Fertilizing
Honestly, I never remember to fertilize my fruit trees at the right time. Maybe it's why I never get fruit. (Or it could just be that they are young trees.) But I've been experimenting with a new way to get them some nutrients, considering my forgetful nature. Instead of using fertilizer, I've been planting nitrogen fixing plants like peas, mayo indigo, and desert lupine around the fruit trees. It's not any less work (in fact, its more), but I actually remember to do it because I see the plants there, reminding me to get to work.
With the peas, I cut them down once they start flowering and plant some new ones. (Once the peas start flowering, the nitrogen starts moving out of the roots and up the plant to get ready for vegi production. If you don't cut the plant down, you loose the nitrogen-fixing benefits.) I've just gone through a cycle of cutting down the peas and planting new ones. Now I need to add some structure for the new peas to grow up so they reach the branches of the trees. Otherwise, they will turn into a tangled mess on the ground.
Ug. Bad hair day!
Pruning
I'm afraid that I may have missed my opportunity for pruning some of my fruit trees and bushes. I think that the idea time to prune them is while they are still dormant, but some of them have already started sprouting new growth. Still, I think there's still a chance with my pomegranate tree, so I'll need to get on that soon.
Repairing Winter Damage
The brief flirtation we had with freezing weather did cause a leak or two in my irrigation system. Between hand watering and the rains, I've been able to avoid fixing the leaks up until now, but I can't avoid them forever. It's time to turn on the system, walk around while it's on, look for all the leaks, and get to work fixing 'em. Ah, the glamorous life!
So how about you? What are you up to in the garden?
Saturday, January 03, 2015
Baby, It's Cold Outside! (At Least By Arizona Standards)
I'm sure my East Coast friends would scoff when I say it, but boy, oh boy, it's cold outside! Yesterday's low in my neighborhood was 26 degrees. That's not really so unusual for my neck of my woods, but it still catches me off guard every time. When I go outside in the mornings, the plants are looking distinctly chilly.
Luckily, the only ones that seem to be worse for wear so far are my nasturtiums, which have pretty much bit the dust. Everything else seems to be making it through just fine. In fact, some of them look downright lovely with their frost-tipped leaves.
But one of the nice things about Arizona is that the really cold weather doesn't last long. In the next few days, things should be warming up.
Which means, it's time to start thinking about what to plant next! Maybe I'll plant some peas. (I've never been particularly successful with them, but maybe this is the year I'll make them work.) I may plant some multiplier onions outside. I may even be really ambitious and start some tomatoes and bell peppers inside to be ready for spring. After all, it's the new year. We're all full of ambitious ideas, right? Happy New Year!
Frosty the Snow Herb
Luckily, the only ones that seem to be worse for wear so far are my nasturtiums, which have pretty much bit the dust. Everything else seems to be making it through just fine. In fact, some of them look downright lovely with their frost-tipped leaves.
Isn't the usual routine to freeze the vegis AFTER you pick them?
Which means, it's time to start thinking about what to plant next! Maybe I'll plant some peas. (I've never been particularly successful with them, but maybe this is the year I'll make them work.) I may plant some multiplier onions outside. I may even be really ambitious and start some tomatoes and bell peppers inside to be ready for spring. After all, it's the new year. We're all full of ambitious ideas, right? Happy New Year!
Tuesday, December 09, 2014
Winter Olla Update
Seems like all the garden bloggers I follow are starting their posts by apologizing for the lack of posts. Everyone is busy with the holidays, busy with work, busy, busy, busy. I guess I'm no different. Sorry for the delay folks.
I did think I'd give a quick update on how things are going in the garden. Specifically, I thought I'd show you how the winter olla experiment is doing. So far, things are going really well! The plants really seem to like being watered from the ollas.
However, some plants are doing better than others. For instance, my broccoli plants are doing fantastic around the ollas. Look at these beauties!
One of them is even forming a head of broccoli already.
Compare that to the broccoli on the drip system and the difference is startling. Poor sad little broccoli.
However, it's a slightly different story with my artichokes. The artichoke next to the olla is doing pretty well.
But there's really no denying that the artichoke on the drip is doing better. Sure, the difference isn't as startling as with the broccoli, but the difference is there.
So far, here's what the olla bed is looking like:
And here's what the plants on the drip are looking like:
I'd say that overall, the olla-watered plants are doing better, wouldn't you? Still, I'm going to keep watching. I haven't actually harvested any vegis yet, so it ain't over til it's over. I'm going to keep watching and see how things go.
Happy gardening folks!
I did think I'd give a quick update on how things are going in the garden. Specifically, I thought I'd show you how the winter olla experiment is doing. So far, things are going really well! The plants really seem to like being watered from the ollas.
However, some plants are doing better than others. For instance, my broccoli plants are doing fantastic around the ollas. Look at these beauties!
One of them is even forming a head of broccoli already.
Compare that to the broccoli on the drip system and the difference is startling. Poor sad little broccoli.
However, it's a slightly different story with my artichokes. The artichoke next to the olla is doing pretty well.
But there's really no denying that the artichoke on the drip is doing better. Sure, the difference isn't as startling as with the broccoli, but the difference is there.
So far, here's what the olla bed is looking like:
And here's what the plants on the drip are looking like:
I'd say that overall, the olla-watered plants are doing better, wouldn't you? Still, I'm going to keep watching. I haven't actually harvested any vegis yet, so it ain't over til it's over. I'm going to keep watching and see how things go.
Happy gardening folks!
Monday, October 20, 2014
Using Ollas in Your Garden (Take 2)
The last time I checked in with y'all, I had learned a very valuable lesson on how NOT to plant ollas the garden. It was all very educational (if not a little embarrassing). Armed with what I have learned from that little adventure, I have embarked on "take 2" of my fall garden olla experiment. Last weekend, I tilled up a patch of garden that's on higher ground than the last time around and enlisted the other Gilbert Garden Girl (my daughter Chloe) to help me mix in some nice soil with the native soil.
This time, the whole patch is fully integrated with the same type of soil instead of having abrupt shifts in soil types. (No more bobbing ollas!) Then, we buried the ollas and got planting. Here's the plan we used for our planting. First, we started with five (somewhat) evenly spaced ollas. (In the diagrams, one square = one square foot.)
Our plan started with big plants (broccoli and an artichoke) clustered around the ollas. (When we went to the nursery, I found some cauliflower plants that I just had to have, so a couple of those broccoli plants in the picture turned into cauliflowers instead. You know how it goes.)
Next, we added some medium size plants (lettuce, herbs) around the big plants. (We mostly planted these from seed.) When the cold weather hits, these should be protected by the leaves to the big plants. (That's the theory anyway!):
Next up: Nitrogen fixers (peas and fenugreek, also from seed). These are scattered throughout:
Last up, we scattered a few flowers throughout to make things pretty. The youngest garden girl got to pick the flowers (of course). She picked snap dragons and petunias:
The hardest things about making this plan was leaving enough room to reach the ollas to add water. It's easy enough now, but when the plants get bigger, it could get challenging. We'll see!
Right now, it's a mix of nursery plants and seeds. So I'm filling up the ollas to water the seedlings, plus using a watering can for the seeds. Once the seeds sprout and develop some roots, I'll be able to switch to watering just the ollas.
Want to learn more about ollas? Maybe from someone a little more trustworthy who seems to have some actual experience? Ha! The best information I have found is the FAQ section of the Dripping Springs Ollas site.
Observe and interact. I first grew broccoli in my garden a couple of years ago. I had the plants all lined up in tidy little rows on a drip irrigation system. I also had a few spinach plants crammed into the same raised bed because I was low on space. That year, we had a lot of cold weather. When the first frost hit, I panicked a bit when my broccoli plants got all droopy, posted pictures of the broccoli on the Tucson Backyard Gardener's Facebook group, and asked if there was any hope. The smart people there told me it would be fine (it was) and also mentioned what a nice job the broccoli had done of shielding the spinach from the frost too. So I've learned my lesson. Broccoli withstands frost well and is good at shielding other plants from it.
Use small and slow solutions. I am in love with the idea of ollas, but as much as I want to, ripping out all my drip irrigation and replacing it all with ollas probably isn't smart. I just don't know enough about ollas yet to know that I can make it work. So I started my experiments with ollas this summer with just two (one "real deal" and one DIY version). Convinced I could make the "real deal" work, I have now branched out with five. Assuming I can make five work, maybe next spring I'll get more ollas. I'll keep building up slowly until I get to the right amount.
Integrate rather than segregate. As you've probably noticed, my little plan is all about integration. (Or as my husband says, "It's going to look like a big mess, but in a good way.") I've packed as many different plants and purposes around five little ollas as I possibly can. Chances are some of them won't do so well. (For instance, I haven't traditionally had a lot of luck with peas, although I am trying a different type that's more suited to this climate this time.) But by including so many different types of plants in there, not only are some of them bound to succeed, hopefully, they will also help each other out.
The Proud Gardener
This time, the whole patch is fully integrated with the same type of soil instead of having abrupt shifts in soil types. (No more bobbing ollas!) Then, we buried the ollas and got planting. Here's the plan we used for our planting. First, we started with five (somewhat) evenly spaced ollas. (In the diagrams, one square = one square foot.)
Our plan started with big plants (broccoli and an artichoke) clustered around the ollas. (When we went to the nursery, I found some cauliflower plants that I just had to have, so a couple of those broccoli plants in the picture turned into cauliflowers instead. You know how it goes.)
Next, we added some medium size plants (lettuce, herbs) around the big plants. (We mostly planted these from seed.) When the cold weather hits, these should be protected by the leaves to the big plants. (That's the theory anyway!):
Next up: Nitrogen fixers (peas and fenugreek, also from seed). These are scattered throughout:
Last up, we scattered a few flowers throughout to make things pretty. The youngest garden girl got to pick the flowers (of course). She picked snap dragons and petunias:
The hardest things about making this plan was leaving enough room to reach the ollas to add water. It's easy enough now, but when the plants get bigger, it could get challenging. We'll see!
What do you think? 3 months from now, will I be able to see the ollas at all?
Right now, it's a mix of nursery plants and seeds. So I'm filling up the ollas to water the seedlings, plus using a watering can for the seeds. Once the seeds sprout and develop some roots, I'll be able to switch to watering just the ollas.
Can you see the little seedlings up front? Or is it like playing where's Waldo?
Want to learn more about ollas? Maybe from someone a little more trustworthy who seems to have some actual experience? Ha! The best information I have found is the FAQ section of the Dripping Springs Ollas site.
This Week's Permaculture Principles:
What?!? Am I still on that permaculture kick? Why yes, yes I am! And here are a few permaculture principles that influenced my little olla plan above:Observe and interact. I first grew broccoli in my garden a couple of years ago. I had the plants all lined up in tidy little rows on a drip irrigation system. I also had a few spinach plants crammed into the same raised bed because I was low on space. That year, we had a lot of cold weather. When the first frost hit, I panicked a bit when my broccoli plants got all droopy, posted pictures of the broccoli on the Tucson Backyard Gardener's Facebook group, and asked if there was any hope. The smart people there told me it would be fine (it was) and also mentioned what a nice job the broccoli had done of shielding the spinach from the frost too. So I've learned my lesson. Broccoli withstands frost well and is good at shielding other plants from it.
Use small and slow solutions. I am in love with the idea of ollas, but as much as I want to, ripping out all my drip irrigation and replacing it all with ollas probably isn't smart. I just don't know enough about ollas yet to know that I can make it work. So I started my experiments with ollas this summer with just two (one "real deal" and one DIY version). Convinced I could make the "real deal" work, I have now branched out with five. Assuming I can make five work, maybe next spring I'll get more ollas. I'll keep building up slowly until I get to the right amount.Integrate rather than segregate. As you've probably noticed, my little plan is all about integration. (Or as my husband says, "It's going to look like a big mess, but in a good way.") I've packed as many different plants and purposes around five little ollas as I possibly can. Chances are some of them won't do so well. (For instance, I haven't traditionally had a lot of luck with peas, although I am trying a different type that's more suited to this climate this time.) But by including so many different types of plants in there, not only are some of them bound to succeed, hopefully, they will also help each other out.
Tuesday, September 30, 2014
How NOT Plant Ollas in Your Garden
It is officially fall, my favorite season in Arizona, and my fall garden plans are well underway. One of the big things I've been planning for this season is to take my olla experiments to the next level. So about a month or so ago, I tracked down a bunch of ollas for sale in Tucson and decided to take a little day trip down there to pick up four of them. (I visited some of my other favorite nurseries while I was there too, of course!) Since then, when I've had time, I've been preparing the garden to put these little babies into action!
First, I dug an individual hole for each of them, leaving space around them to add the plants:
Then I hollowed out the areas between the holes because I wanted to plant there too:
Next, I placed the ollas and filled the hollowed out area with some really good dirt:
To pretty things up a bit, I added a nice border around the edges where the native dirt met the "good" dirt:
Now, before you look at the next picture, who can tell me what's wrong with this design?
Give up? Well, water will be absorbed by the two types of dirt at drastically different rates. The native dirt (which has a lot of clay) absorbs water slowly, but it does absorb it. The "good" dirt doesn't absorb water much at all. Instead, the water just runs right through. When this design is hit with a lot of water (say, by one of the big rains that we had recently), the whole thing acts like a big bath tub with a clogged drain. (It doesn't help that the whole setup was in the lowest part of my yard.) So during the rains, the ollas started floating in the dirt like plastic toys in a toddler's bath tub:
Oh well. Happily, this all happened before I ever planted anything. So I didn't lose any plants. I'm already working on "Plan B" that will work better. I expect I'll have it implemented in a week or two. Stay tuned!
Observe and interact. As you can see, I put a decent amount of work into making my little olla design work. That was a lot of digging. It was tempting to be stubborn jackass and stay the course. ("Rainy season is over, right? It won't flood again soon. I can make this work!") But it didn't take much observation at all to see that staying the course wasn't a good long term solution. Rather than sticking with what I wanted to make work, based on my observations, it was clear I needed to take action and move onto a different plan.
Catch and store energy. One of the reasons I really love the idea of ollas is I think they are a
great way to catch and store energy in our desert environment. They are
a perfect way to distribute rain water--the best type of water for
plants--exactly where it's needed (directly to the roots). And they are
so efficient! Plants use exactly as much water as they need and no more!
Optimize the edges. This is a clear example of how I did NOT optimize the edges, isn't it? By having such a stark contrast between the native dirt and the "good" dirt, I created a real problem. I'll have to learn from this when I implement Plan B!
First, I dug an individual hole for each of them, leaving space around them to add the plants:
Then I hollowed out the areas between the holes because I wanted to plant there too:
Next, I placed the ollas and filled the hollowed out area with some really good dirt:
To pretty things up a bit, I added a nice border around the edges where the native dirt met the "good" dirt:
Now, before you look at the next picture, who can tell me what's wrong with this design?
Give up? Well, water will be absorbed by the two types of dirt at drastically different rates. The native dirt (which has a lot of clay) absorbs water slowly, but it does absorb it. The "good" dirt doesn't absorb water much at all. Instead, the water just runs right through. When this design is hit with a lot of water (say, by one of the big rains that we had recently), the whole thing acts like a big bath tub with a clogged drain. (It doesn't help that the whole setup was in the lowest part of my yard.) So during the rains, the ollas started floating in the dirt like plastic toys in a toddler's bath tub:
Oh well. Happily, this all happened before I ever planted anything. So I didn't lose any plants. I'm already working on "Plan B" that will work better. I expect I'll have it implemented in a week or two. Stay tuned!
This Week's Permaculture Principles:
Hey, remember how I'm obsessed with permaculture? I thought I'd talk about the permaculture principles I observed in this week's exciting episode of Gilbert Garden Girls!Observe and interact. As you can see, I put a decent amount of work into making my little olla design work. That was a lot of digging. It was tempting to be stubborn jackass and stay the course. ("Rainy season is over, right? It won't flood again soon. I can make this work!") But it didn't take much observation at all to see that staying the course wasn't a good long term solution. Rather than sticking with what I wanted to make work, based on my observations, it was clear I needed to take action and move onto a different plan.
Optimize the edges. This is a clear example of how I did NOT optimize the edges, isn't it? By having such a stark contrast between the native dirt and the "good" dirt, I created a real problem. I'll have to learn from this when I implement Plan B!
Wednesday, September 03, 2014
Freezing Okra for the Winter
The unbelievable has happened. My family and I are actually getting a little tired of eating okra. (I know. I can hardly believe it myself!) A couple of weeks ago, I found myself thinking, "Well, I think okra season is nearly done anyway."
I took this picture this morning:
If you're in the same boat as me--so much okra, you don't know what to do with it--you might want to think about freezing some of it for later. I'm guessing you'll be happy to have it in the middle of the winter to put into jambalaya or stew or something. (I know I will!)
Here's the article I found for freezing okra: WikiHow: How to Freeze Okra. I found it very useful and have used it a couple of times now when my family couldn't face one more okra dish! It seems a lot more constructive than making them eat it until they hate it with a passion, doesn't it?
I took this picture this morning:
Look at all those flowers. I don't think okra season is nearly over.
If you're in the same boat as me--so much okra, you don't know what to do with it--you might want to think about freezing some of it for later. I'm guessing you'll be happy to have it in the middle of the winter to put into jambalaya or stew or something. (I know I will!)
Here's the article I found for freezing okra: WikiHow: How to Freeze Okra. I found it very useful and have used it a couple of times now when my family couldn't face one more okra dish! It seems a lot more constructive than making them eat it until they hate it with a passion, doesn't it?
Subscribe to:
Posts (Atom)