Except, it’s not quite that easy.
First, you have to remember to change the timer a few times a year. Turn it up in the summer, down in the winter, and maybe once or twice in between. Maybe pencil it in on your calendar, or computer, or cell phone, or whatever, so you’ll remember to actually do it. (I’m not even going to try to advise you beyond that, because I’m no pro. Luckily, the AZ Plant Lady is a pro, and she’s got some great tips for you: Too Much Water Equals More Pruning, a Backache and More $ Spent in the Garden.)
Next up, you need to periodically check for leaks in your drip lines and repair as required. I don’t know how often you should do this, (once a year? once a season?) but I know I don’t do it enough. Well, I finally got off my lazy patootey this week (that’s right, I said patootey!) and got to work. Luckily, it’s not nearly as hard as I thought to fix leaks in a drip line, because I had a lot of them to fix!
Step One: Investigate
This is easy. Get a pen and paper, turn on your drip irrigation, and start walking around your yard looking for leaks. You may find some big leaks (I had some major gushers where I think the drip emitter got cut clean off, probably during some overly diligent weed whacking) and some much smaller leaks (holes in the main pipe, loose fittings between the main line and the little runner lines that go directly to the plants). If you’ve got a lot of leaks (like me!) write down the location of each so you remember where to go once the water is turned off.
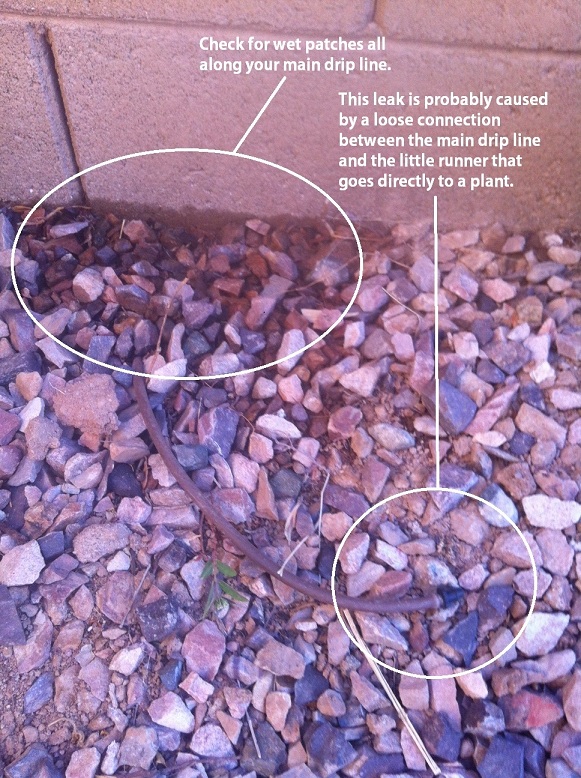
Just one of the many, many leaks I found in my system
Step Two: Patch ‘Em Up
I found that the hardest part of patching these things is digging out the dirt around the leaky line, since my lines are buried. Once I gave myself a little room to work though, patching the lines was easy.
For big leaks, I used couplers I found at Lowes for about two bucks a piece. The only other tool I needed was a pair of scissors. Here’s a 35 second video that shows how to do it. 35 seconds! Yes, it’s that easy. http://www.youtube.com/watch?v=lGzhiGsi2hc
For smaller leaks, I was able to use goof plugs. This is even easier (and cheaper!), as seen in this 6 second video: http://www.youtube.com/watch?v=mwMA7nBjcY8
Probably the most time-consuming leaks to fix were the ones where the little runner lines (I’m sure that’s not the right term) that came off the main line had come loose. Still, this was easy too. I just pulled out the loose line (no tools required), patched it up with a coupler or oops plug (as described above), and punched a new hole in the main line where I could reinsert the runner line. I couldn’t find a YouTube video of this procedure, but let’s say it takes about 2 minutes and doesn’t require a lot of fancy tools. Not too bad, right?
Step 3: Rinse and Repeat
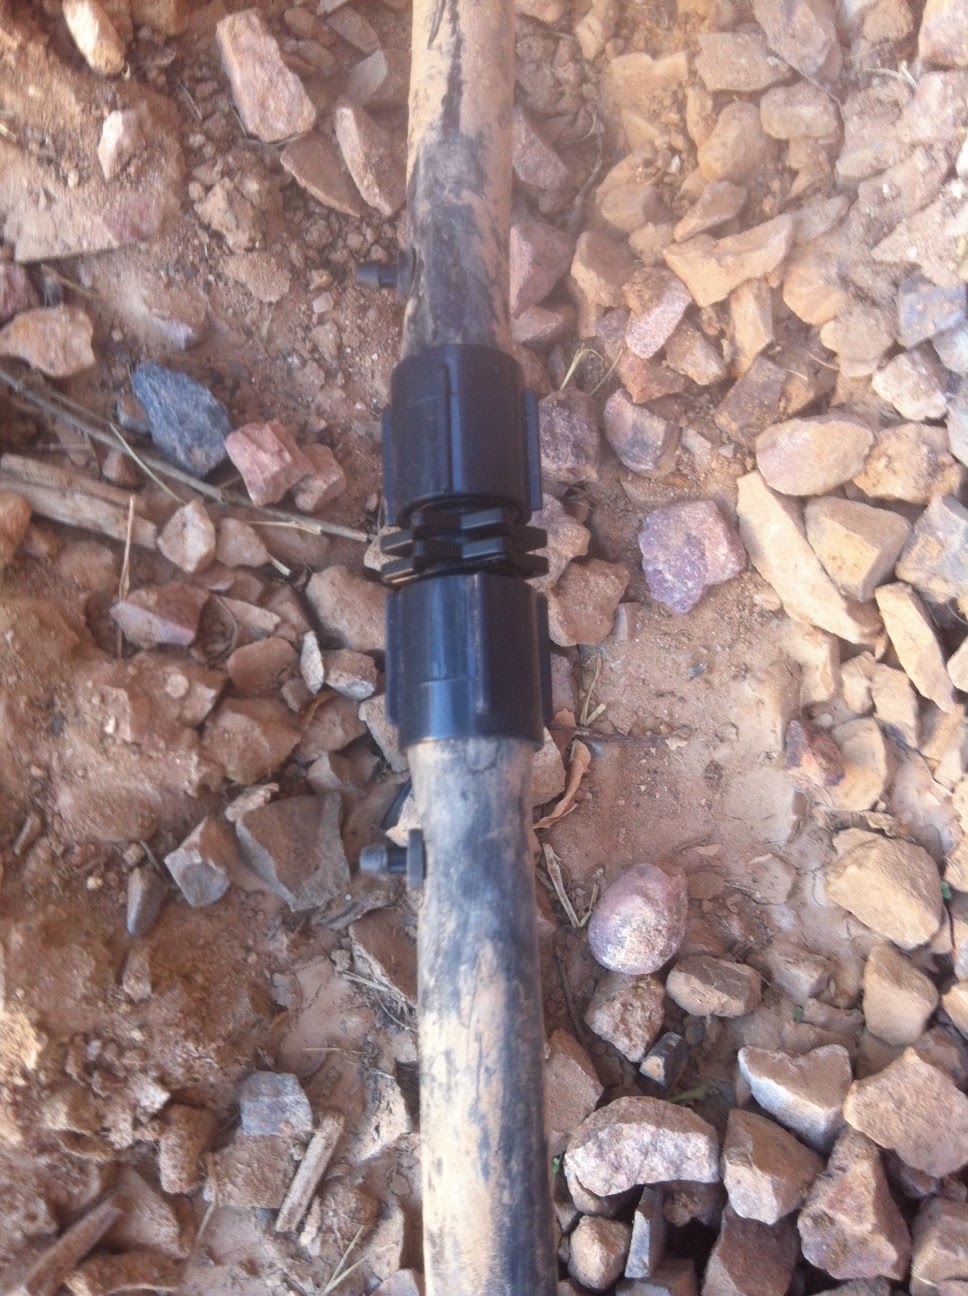
Here’s the kicker. Once you’ve repaired all your leaks, check your work! I went out this morning and found that I had forgotten to patch one or two holes, and some of my patches didn’t quite work. For instance, here’s a pic of a leak I “fixed” with a goof plug. Clearly, it needs a coupler (which is more sturdy) instead.

If at first you don't succeed, try, try again
Keep fixing and inspecting until you’re sure you’ve got ‘em all fixed.
That’s it. Now that I’ve worked through the worst of it, I’m not sure why it took me so long to do it. As far as maintenance goes, it really wasn’t bad at all.
In my next post, I’ll talk about using soaker hoses instead of drip irrigation to more easily customize your system for ever-changing vegetable gardens.
Update (May 30, 2013):
I forgot one very important step in this post! In addition to checking for leaks, you should also check for clogged emitters. As with everything else described here, this is easy. Just turn on your drip irrigation system, walk around to all your emitters, and make sure they're actually spurting out some water. If not, replace the existing emitter with a shiny new one. Voila! That wasn't so bad, was it? :)
No comments:
Post a Comment